After we got our
new bed we needed a headboard and I didn't want to spend hundreds of dollars to buy a new one, so I decided to
DIY one. I found a few online guides and decided that for this first project I would just make a basic rectangle headboard, easy
peasy.
Here is what I did:
1. Taped out the outline on my wall so I knew about how big it would be, then put the pillows on the bed and sat back, was it tall enough? YES. My headboard measures 2 inches wider than the actual bed and is 36 inches tall.
2. Bought the supplies: 1/2 inch plywood (which my dad bought, cut to size and sanded), fabric and batting (which was wide enough & on sale), D hooks, nails & screws . I decided to do two rolls of batting and no foam, only because the store didn't have the foam they had advertised and I wanted to get it done that day. The batting was thick enough so I was happy with it.
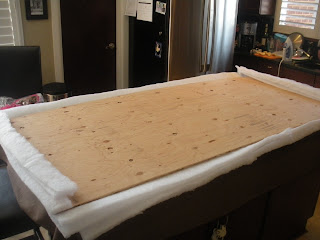
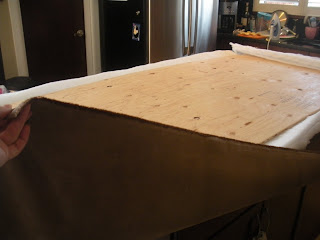
3. Lay out the fabric on a big surface - I used my kitchen island, but you could use the floor or a table. Also, iron the fabric if it isn't ironed already. Then lay the batting/foam on top of that and then the plywood on top of that. Here is where I made a slight mistake. I forgot to make sure I had enough fabric on all sides to wrap around the batting and to the other side of the fabric - don't make that mistake.
4. Now, get the staple gun out. Or in my case be glad your dad brought his because you can't figure out how to put staples in your gun. We stretched the fabric around all sides and started to staple every few inches. We stapled the sides first, then the top and then the bottom.
5. After we got all the fabric stapled in place, we placed the "D" hooks onto the back of the headboard. My dad then measured where, based on the "D" hooks we should place the nails for the hooks to hang on. He hammered the nails into the wall, we took a deep breath that the measurements were right and lifted the headboard towards the wall. We hung the headboard on the first try!
6. Take a step back and admire your work; or lay down and rest your head on your wonderful headboard.
So there you have it, a great looking (if I do say so myself) headboard, all made in a few hours.


